


A while back my friend, Melissa, came to me and asked if I would help her make a frame for her family picture. She had seen this one in a store and loved it but it was too pricey. It was close to $100 dollars! After going to look at it myself I knew we could make it for cheaper and even cuter.

So here is how we did it!
I went to Home depot and bought 2 1x6x8 pieces of wood, and a large piece of this rope trim molding. I prefer to buy wood at Home Depot because they let you pay by the foot Lowes makes you pay for the entire piece of wood even if you don't need the whole thing.

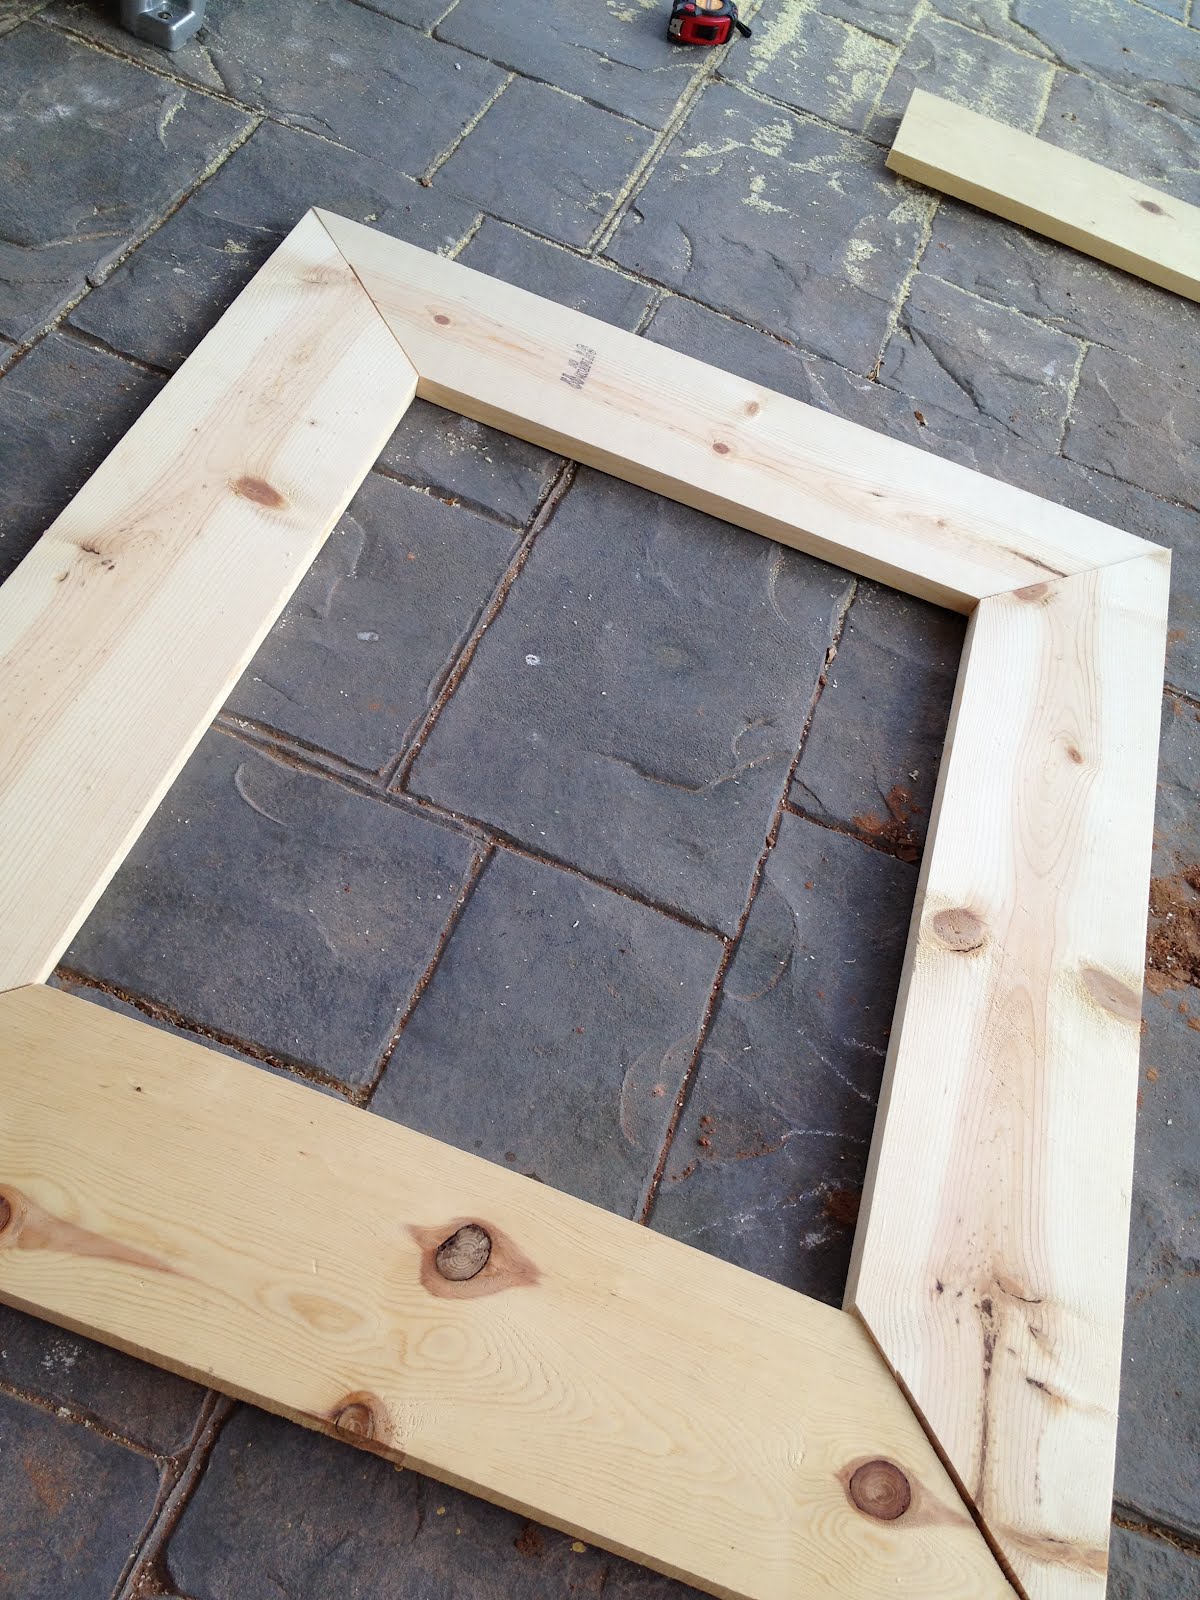
Then I brought it home and had C.J. cut our wood and trim at the right angles.

For a standard square or rectangle frame it is just 90 degree angles. If you don't have access to a miter saw don't give up there are other ways to cut your angles. You can use a miter box, which looks like this.
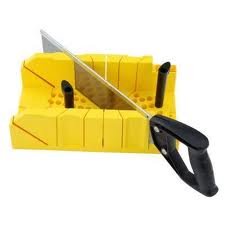
I found this miter box at homedepot.com and it cost about $15 dollars. Here is a great tutorial I found online for using a miter box. Click Here. If you will never use a miter box again don't go out and buy one. The Home Depot where I am has a saw they allow customers use and pay .25 cents per cut. This would be much cheaper than buying a miter box.
You can make your frame any size you want. Just remember that when you are printing your picture out you may have to ask your photographer to make it a certain size or you can just print it larger than you need and cut some of the background out so that it fits in your frame. Melissa's frame was 28x32 and the opening is 17x21
We even had enough left over for me to make a little frame!

My frame is a 10x10 and my opening is 3x3

If your cuts are not perfect dont worry about it. Ours weren't either. Since we are covering the wood no one will see your cuts so it's not a big deal. You just need to make sure the pieces that are across from each other are the same length so that your frame is nice and symmetrical. If you need to you can take a file and file down some of the imperfections with the cuts.

Then C.J. took his nail gun and shot a few nails into each corner of the frame.
Melissa's frame is really big. It took up my whole kitchen island and I had to stand on my barstool just to get a picture of it.

We also screwed brackets to the back of the frame on each of the corners where our pieces met to make sure our frame was nice and sturdy.

Then we filled the cracks with a wood filler.

You will have to work the wood filler into the cracks with you fingers.

After your wood filler dries, sand it down so it is nice and smooth.

Now you will do the same process for the trim pieces.

Cut your angles and lay them out to make sure they are even.

If they don't line up perfectly thats ok!

All you have to do is file the edges down.

Here is my frame.

It would also be helpful if you labeled your wood and crown molding pieces so that you don't have to refigure everything out when it comes to glueing your molding on.
After that you are ready to cover your frame. We used paintable wallpaper but you can use scrapbook paper, fabric or whatever you want!

Before you lay your frame on top of you wallpaper to trace the cut make sure you like how your wallpaper is lining up on your frame.

Mine was really easy cause it was so small but Melissa's was a little harder because her frame was wider than my roll of wallpaper so we had to cut it into two different pieces.

After your paper is cut you can just follow the directions on how to apply the wall paper. If for some reason you don't have them all you have to do is soak your paper in water for about a minute and then set it out on your counter for a few minutes before applying it to your project. When you are applying your wall paper take a credit card or something with a straight edge and gently work all of your bubbles out by lightly scraping from the center of your project to the nearest edge. This could get messy. You will be pushing some of the glue out from the edges but if your working out the bubbles lightly your project should be fine.

Here is Melissa's frame before being painted, stained and glazed.
She even took an exacto knife and cut about 1/4 an inch of the wallpaper off the edges to give it more of a distressed look. You could also sand the wall paper down which is what the people did on the original frame that inspired this project. After your wallpaper is dry you can then put a coat of paint on it. Melissa painted hers cream and did a dark brown glaze over the top. I will be putting mine in my girls bathroom so I needed it to be a little more girly. I painted mine a teal and lightly brush a Martha Stewart silver metallic color over the top. I didn't want a lot of silver so I took a dry paint brush and after lightly dipping my brush in my paint I wiped it onto a paper towel. Then I gently brushed it over my wallpaper so that it covered the raised portion of my wallpaper. For a tutorial on how to paint your paintable wallpaper Click Here.
After your frame is painted your next step will be to paint your crown molding pieces and then apply them to your frame. We simply used wood glue to glue ours on.

After you glue on your crown molding, fill in the cracks with wood filler.

I actually prefer the Elmers wood filler over the Minwax!
After your wood filler dries sand it down the best that you can so that it is smooth and then paint over the filler.

You will also need some sort of brackets or wire to hang your picture. I am just putting mine on a shelf so i didn't put anything on mine but Melissa adding some brackets and a wire to hang hers.
Here are our final projects!

Melissa painted her molding a dark brown and then sprayed her project with a spray polyuratane to give it a nice sheen. Melissa used the wallpaper I had on hand from my fireplace (click here to see that project) so I just guestimated on the amount she used and how much she owed me for materials but the total cost of Melissa's project was just under $25!
Here is my project. The total cost of my project was about $6!


I absolutely love how my frame turned out however I will say this. If your doing a large frame like Melissa this is the best and cheapest way to go about accomplishing your project. If you are going to do a smaller frame like I did you may be able to find a frame at a garage sale that you can repurpose which would be a lot easier than building your own frame.

After finishing my project. I found these frames at a garage sale, 5 for $3 dollars. It would have been much easier and cheaper to apply wallpaper and crown molding for the same effect.
I am linking to these parties:


0 comments:
Post a Comment